Search

thomas drake blog

Tag

Design Discourse 1

Learning How to Add Colour

Today I had a great revolution in Maya.  Not that exciting really, but my team mates Michelle and Phoebe showed me how to achieve colour in my animations and make them less dull and grey like they have been the last few weeks.

I am highly amused by this small learning curve and am starting to add colour to my previous animations to see the different styles and effects I can draft into my Maya assignments.

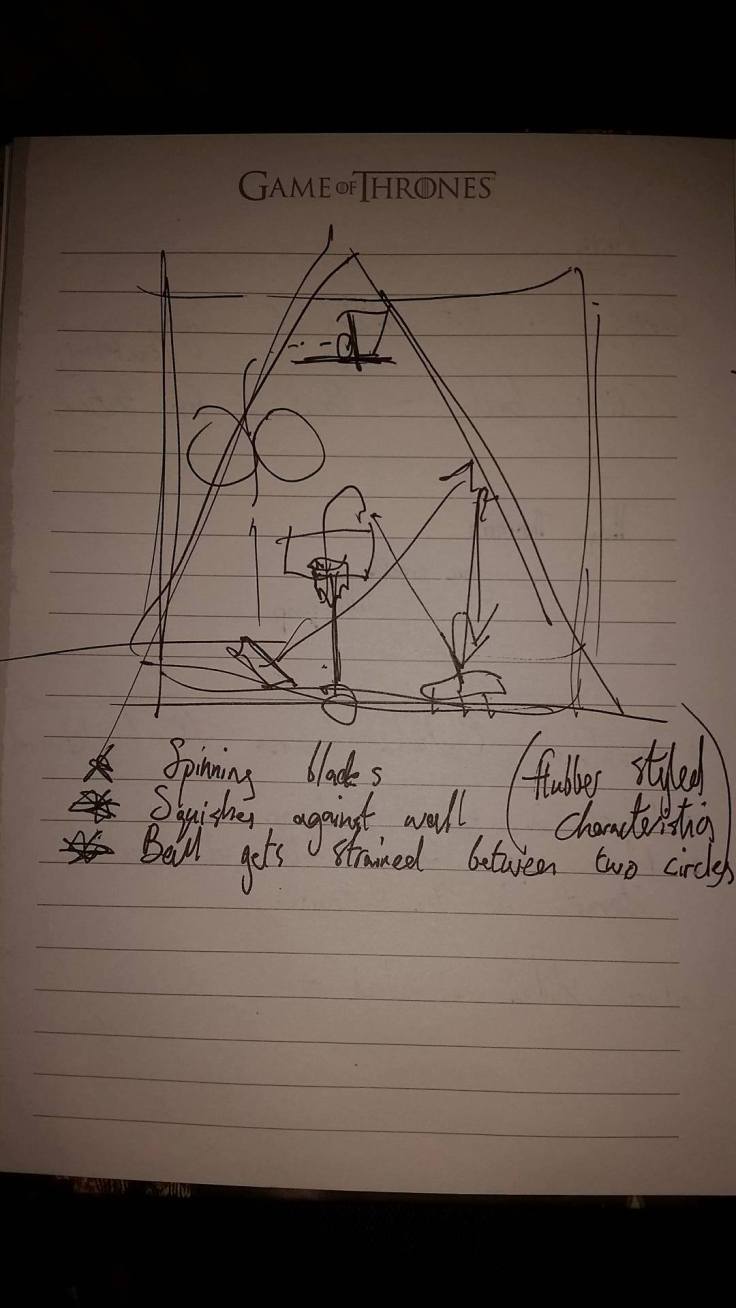
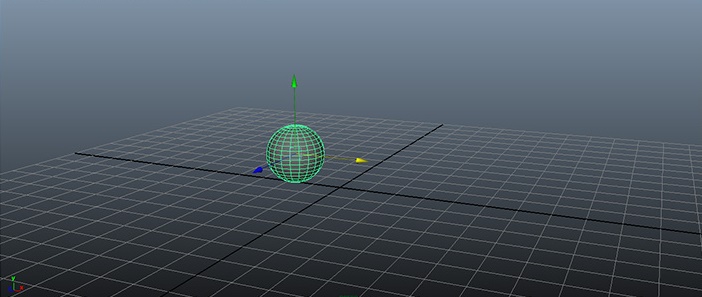
I didn’t realise how easy it was to achieve colour but am really grateful or the help Michelle and Phoebe have been to me in helping me learn how to do this.  Below is an example of how i have started to go back to my previous animations and adding colour to the main content models within the animation.  Here is my original bouncy balls animation but this time with a twist of colour magic!:-

Presenting Arm Rig

Today we got to present our arm rig exercises to Alec to get his feedback and thoughts on the work we had done.  I showed Alec my more mechanical arm I created on my own and he was able to explain to me why I wasn’t able to achieve the movements that were available on his rig.  One day maybe this year I would love to learn this whole side to rigging the model so I can learn to make them movement and manipulate them to make them more realistic and fluid.

I also got to show Alec my attempt at working on secondary and overlapping action on his rigged arm animation.  He has told me to come back to this at a later stage, maybe in a couple of weeks, and work on the movements more.  He said it was good but did need some work in it to enhance the overall appearance and realism of the animation.  Below is the video clip of my animation using Alec’s rig:-

Today in class Alec talked us through our next Maya assignment which involves a lot of learning the term ‘interaction’.  Alec has provided us with a worm blob rig (A rig of a small purple slug looking character).  Using this rig, we are to make it move and interact with the surface it is on.  Whether that be a jump and landing or a slug styled movement along the ground.  This will be an interesting challenge to attempt.  This will involve us moving the tail and head of the character in harmony as to create the illusion of movement or interaction with the character’s surroundings.

Arm Rig – Team Discussions

Today our team messaged each other to see how each of us is fairing for this arm rig Maya assignment.  Truth be told? We are all struggling.  Phoebe was confused today about how to speed up her arm rig and how to control and move key frames.  Michelle was able to suggest Phoebe used the dope sheet as it is the main tool that can be used to control key frames and the speed of an animation.

I have struggled with this arm rig so decided to go off and try and design my own arm just to see if I would be able to do it.  Unfortunately I still don’t really know the difference between a rig and normal models.  I soon figured out that the rig that Alec provided us with, allowed us to move each separate component of the arm as they were each saved individually as parts on the model.  Whereas, my model that I had designed was not rigged and so when it came to trying to move it and make it look realistic….I had no chance….and found myself confused and annoyed at myself because I couldn’t do it right.

Even though my model was not what this week was about, I was still kind of happy with the set up and content of my short animated arm.  It is very mechanical but I used various techniques within the animation to make it seem like the ball in the animation was being lifted by the arm, carried a short distance and then let down again.  I will post it below: –

I will aim to work on the rig Alec provided us with tomorrow and try to focus further on the whole overlapping action and secondary action areas.

Maya – Presenting Obstacle Course

Today in class we got to show our obstacle courses to our teams and Alec and get feedback on how we got on.

Alec liked the different aspects of my course but agreed with me on the need for more realistic bounces and interactions between the ball and the things it finds itself colliding into.

My team thought my course looked really well, especially for someone who two weeks ago didn’t know how to move a ball or resize it.

Below is the video link to my Maya obstacle course: –

Alec also assigned us our next Maya assignment for next week.  He has given us the rig of an arm with a mechanical appearance.  Our job for next week is to work in our teams and each create a movement in the arm that shows the overlapping action and follow through principles of animations.  This will be interesting…something tells me im going to need some help with this one…

Maya – Developing from Basics

In the past week we have been designing bouncy balls in the small groups we have been put in to.

I was totally lost but luckily on Wednesday evening I stayed late and my classmate Gianni helped me out and within no time I had created the bouncy balls that my group had decided on.

Today we showed our work to Alec and he assigned us our next Maya assignment for the forthcoming week….to design…..an obstacle course for our bouncy ball.  What?! The thought of this melts my head but I will try my best to carry out this assignment and if I get stuck im sure I can always get someone more technically knowledgeable to help me with it.  My group and I have came up with a rough sketch of what we are each going to try and portray but we will see how they work out this time next week!

Below is the video of my finished Maya Bouncy Balls.  The tennis ball, bowling ball, beach ball and extra super bouncy ball that I added to see if I could create a ball by myself without help: –

My group and I met up before heading for lunch today and discussed what we would like our obstacle course to look like and what features it may have.  We were very imaginative and over enthusiastic with some of our suggestions but we will feedback to each other and ask each other when needed for help and guidance.  Below is a tough sketch of our original plans for the course:-

12422252_1007516362645488_2145087520_o.jpg
Basic sketch of our team’s potential obstacle course.

Maya Group Catch Up

Today our group messaged each other to see how each of us is getting on and to get feedback on how each of us could develop our bouncy balls.

Phoebe and Michelle had a tough time with the rotations of their spheres and Michelle told us about how she had closed her laptop earlier and forgot to save her work! Disaster!

Eoin then messaged to say that he was yet to start but was just about to get started on the project.  We are all on roughly the same level right now, either doing nothing, or doing something but it isn’t working terribly well.

I am still very confused with the whole process of saving frames and what key frames are.  I am learning how to move and resize the spheres but am staying late tonight to try and self teach myself how to make these spheres bounce and move.


Maya ball
Screenshot of a sphere being created in Maya

Introducing, the Beach Ball

We have decided to replace the super bouncy ball design with one for a beach ball as it avoids sharp bounces and allows us to experiment with another style of squash and stretch.  We as a team have discussed how we plan to go about making this and will feedback to each other in the next couple of days to see how each other are getting on with this task

Here is an example I found of a beach ball drop: –

Planning Bouncy Balls in Team

My Maya team (Myself, Phoebe, Michelle and Eoin) started a group chat on Facebook to negotiate and store our thoughts, ideas and research for all things Maya.  Today we discussed how we are going to tackle this bouncy ball challenge set by Alec to create three different styles and types of bouncy balls in Maya for next Friday.  We have loosely decided on a tennis ball, a super bouncy ball and a bowling ball as these all have different weights, masses and sizes and are all unique in their own way and carry with them their own squash and stretch abilities.

We are going to discuss and keep in contact with each other as we work on our Maya stuff over the next few days as we feel that we may change the style of one of the balls to add more diversity to our range.

Michelle found some research and carried out some research for our team which she has given us permission to use on our blogs which I will post below.  They are videos of the various balls we are creating being dropped from a height.  We will  be able to use these to construct our Maya projects in a more accurate and realistic fashion.

From here, Phoebe found us a video of  bowling ball being dropped as they wasn’t able to be obtained by anyone on the team so we searched online for a reference point.


Introduction to Maya Basics

Today, Alec introduced our class to Maya basics and has assigned us a homework for next week to create three different types of bouncy balls.  I am nervous and excited about this challenge. 1) I have no idea what I am doing. 2) I can draw a ball, but dont know how to do that on Maya. 3) Alec must think I am a genius! But I will try.  Alec has given us enough information and guidance to create these bouncy balls so I will use these assets to try and carry out this challenge.  Watch this space….

Maya Hotkeys

Create a free website or blog at WordPress.com.

Up ↑